Friday, 31 August 2012

Catering: Rotman Commerce Students' Association (Informal) Leader Social

My first catering job (of many, hopefully)! By 'my' I'm referring to my baking business with my partner, Lizzie. Our website is coming soon.

This was the Rotman Commerce Students' Association (Informal) Leader Social - Rotman Commerce is my current study of program, for context - and this event was aimed at gathering student leaders for a fun social event prior to the start of another crazy school year. 

It was a classy tea party setting with a presentation at the end of the room. Macarons, cupcakes, sandwiches, biscuits, and tea were served.
My partner and I prepared 3 types of cupcakes and 4 types of macarons for the event. We delivered them for the first section of the social - the tea party portion. I made the 3 cupcakes - vanilla, chocolate, & red velvet, and 1 of the macarons - salted caramel. My partner made the other 3 macarons - rose, lemon, vanilla/chocolate. 

Everything was brought to the event unfrosted and I piped prior to the event

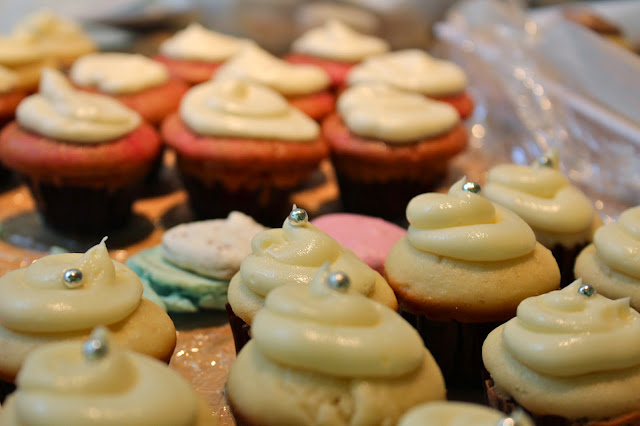
Red Velvet cupcakes with cream cheese frosting and vanilla cupcakes (with chocolate chips) and chocolate frosting

Vanilla cupcakes moments after I piped the frosting

Red velvet cupcakes and vanilla cupcakes decorated with candy pearls

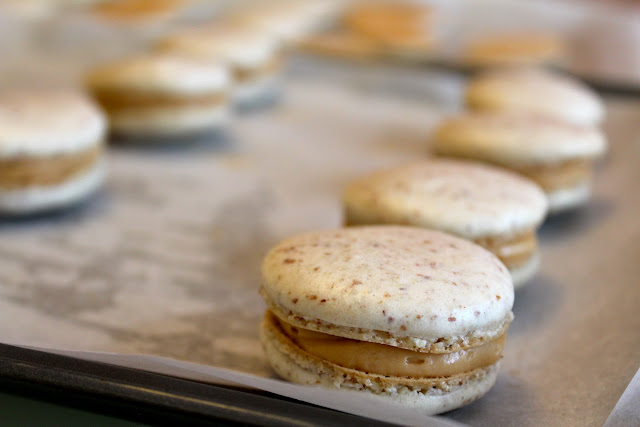
Salted Caramel Macarons!

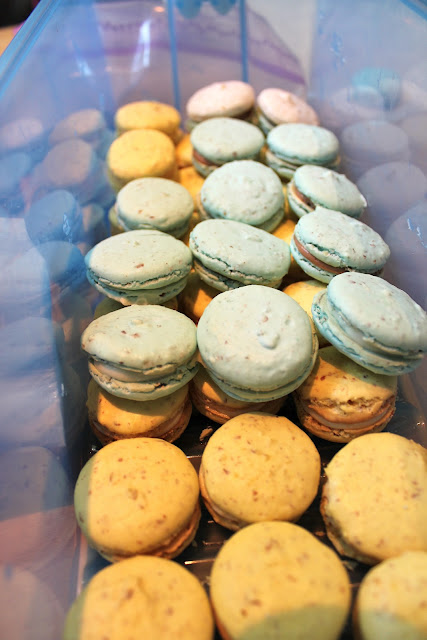
Lizzie made all of these macarons in one night! 

Almost everything! Another tray of cupcakes sat behind the box of macarons. Isn't this a feast for the eyes?

I loved this about the tea party - the array of teas, all from Davids' Tea.

Setting up at the social - very classy.


Chocolate chip peaking out from inside the cupcake
The 'Pink Flamingo' tea smelled delicious
A rose macaron sitting proudly on top


Members of the Students' Association setting up the cupcakes 

Things I learned through this experience:
- To be a little more realistic with how much I can accomplish in a certain length of time
- I've got miles to go in perfecting the Swiss Meringue Buttercream
- To get a weekly pass for public transportation during these events
- To buy cheaper ingredients and have them all at once!

I had a great time setting up for this event though! I thought it was such a cute idea.

If you attended and had any of the cupcakes or macarons, leave your comments, concerns, and suggestions! I've definitely still got work to do on the Vanilla cupcakes as they have a hard time being moist, but I'm only getting better!

Thanks for stopping by!

- Jane


Wednesday, 15 August 2012

Peach & Apple Galette

After a very long day of studying, all I want to do was come home and make some sort of a pie.

Galettes (which I now know are pronounced with a hard 'g' like 'goats') are a rustic type of tart that don't require any sort of tray to hold its shape. They're so easy, fun, and delicious. They're also not too sweet which is exactly what I need right now.

They can be made with all types of filling - strawberry, rhubarb, apple, peach, pear, figs, etc.
But they aren't limited to just sweet - cheese & spinach, ham, bacon, etc.
They can be decorated with almonds or other types of nuts.


Typical galettes leave the top uncovered but many traditional types cover the top and bottom as if a free-standing pie.

Ingredients:
  • 1 Basic Pastry Dough
    • 1 1/4 cups flour
    • 1/4 - 1/3 cup cold butter
    • 1 pinch salt
    • 1 tbsp sugar
    • 1/4 - 1/2 cups cold water
  • 1 peach, cored
  • 1 good apple, peeled (or not, your choice)
  • 3 tbsp white sugar
  • 2 tbsp brown sugar
  • 1/2 - 1 tbsp cinnamon
First, preheat your oven to 400 F.

Then, make your dough:
I showed the step by step process of making a basic pastry dough in my Apple Pie recipe. It's exactly the same so just follow that.

When your dough's in the fridge to cool, prep your fruits. I cored my peach by cutting a straight line all around the fruit and turning. Get rid of the pit and the hard bits in the middle. 


Start by slicing thinly from the centre outwards, trying to make even sizes of apple and pears. For an idea of how they'll look, here's mine below.

These don't look too pretty only because they've been tossed in brown sugar, cinnamon, and white sugar. And that's your next step, toss the apples and peaches in cinnamon, brown sugar, and white sugar.


Once you roll out the dough, cut it into a 13-inch circle (I estimated). Here's where I suggest moving the dough to your actual baking tray, I had this whole fiasco trying to move my prepared Galette onto the baking tray. 

Arrange your sugared fruit onto the pastry dough like above (or however you'd like). Fold one flap inwards, grab the right or left corner of the flap and fold inwards. Go around in a circle.


Once done, you can choose to decorate the top however you'd like. You can sprinkle it with sugar, decorate with slices almonds, or brush it with a beaten egg like I did. Pop it in the oven for 40 minutes until nice and golden brown.


I used a very ripe peach so once it came out of the oven, there was a large amount of syrup left behind. Not a bad thing at all though, it's delicious and will leave a nice gloss when cooled.


And that's it! Definitely a very simple and rustic pastry. Serve warm with ice cream!


Enjoy!

- Jane

Free Time: Vanilla Cupcakes & Macarons

Free time posts! These don't entail recipes, just some salivating-worthy photos for eye candy.

My friend and I made a whole big batch of mini vanilla cupcakes and a couple batches of macarons over the weekend (as a part of product testing for the business), check it out?


A friend (friend of a friend) was nice enough to let us storm in with our ridiculous amounts of baking equipment, ingredients, loud voices, and just take over the place. 


Aren't they adorable? We faced off Joy of Baking cupcakes against Martha Stewart cupcakes.


Chocolate Macarons using the Italian Meringue method where a hot sugar syrup is poured into the egg whites while being beaten. Very tricky method but definitely glossier macarons. The ruffles underneath are also different per method.


After making the Swiss Meringue Buttercream. Delicious.
I had a slightly different experience making the Swiss Meringue Buttercream this time round. I made the meringue then beat the butter seperately (as I did last time). I mixed them together and it hit this curdled-looking stage. I once read that when the butter hits the meringue, it sometimes hits a curdled stage but if you continue beating, it comes out just fine.

That's what I did LAST time but it just kept getting more liquid and more liquid, so I thought that was a complete myth. This time, I kept beating it and it turned out to be the most light, glossy, and perfect frosting there could ever be. I could not have been more happy. Still not sure how to remedy a situation like the first time (where it turned to liquid) but I'm sure I'll work it out.


And that's my spare time! Enjoy.

- Jane

Wednesday, 8 August 2012

Salted Caramel Macarons

3 things I love about caramel:
  1. It reminds of a summertime fair 
  2. It's literally just sugar
  3. Its gorgeous brown colour
1 thing I really don't love about caramel:
  1. How messy it is to make.
I made salted caramel macarons! And they are so so so good. The shells are so light and airy, and the filling is so creamy and tangy. I used a different recipe compared to the first Vanilla Macaron Recipe I posted. Both are great and very similar, this one is just half the quantity. 


Macaron Shell: (makes about 20 small or 10 large)
- 1/2 cup of granulated sugar
- 3 egg whites
- 1 cup of almonds (I'd go with sliced or already ground)
- 1 cup of icing sugar
- Food colouring

Salted Caramel Filling:
- 1/4 cup fresh cream
- 1/4 cup + 1 tbsp of granulated sugar
- 1/2 tsp fleur de sel (coarse sea salt)
- 1/4 cup butter (room temperature)

To make the shells, first grind your almonds and icing sugar in a food processor and sift into a mixing bowl. Set that bowl aside. If you've got a small food processor like I do, grind your almonds first with a 2 tbsp of icing sugar to keep your almonds dry, then mix in the rest of your icing sugar. 


The trouble with a mini food processor is that it won't grind up the almonds as fine. I used whole almonds and my food processor can only grind so much so that's why you see little specks in my macarons which is the skin of the almond. I think it gives them character.

Separate your egg whites and put into a heatproof bowl. As I say every time you're making a meringue, here are my tips:

  • Don't get any yolks into your egg whites while separating! The fat of the yolks can very well mess up your meringue.
  • If you get shells in while separating, do not fish them out with your fingers! Same goes, the oil from your fingers can mess up the meringue. Instead, take a spoon (or chopsticks) and attempt to get the shell pieces out.

Over a double boiler, heat your egg whites and granulated sugar. To set up a double boiler, fill a pot with about an inch of water and simmer it with a heatproof bowl on top. 


Whisk until the sugar dissolves and using a candy or instant thermometer, remove off heat when the sugar and egg whites reach 105 -110 F or around 45 C.

Transfer to a mixer and beat on medium high for 4-8 minutes until soft peaks. I was very very close to over-beating at the 5 minute mark but it all depends on your mixer and the way you beat it. You're done when you lift up your whisks and the egg whites stand upright without falling or they hang off your whisks without dripping. 


As soon as you hit the consistency where the ribbons made by the mixer stay in place, stop beating. Mix in half of the almond flour, fold gently until streak-free, and fold in your other half.


Continue folding until streak-free, add your food colouring here, and scoop into a piping bag. You can choose to use a #11 tip (large circle tip) or simply use the opening of the piping bag. For piping the macaron shells, I highly recommend using a template underneath. For example: here. You can add a pinch of the sea salt on top of your macaron shells. 


These were my large macarons, about an inch and a half wide. Let them sit for 15-30 minutes until a skin has formed on top. Bake for 12-15 minutes at 275 F. Check at the 12 minute mark by tapping a toothpick or chopstick on top. If it's hollow sounding and you can see the bottom isn't still wet, take them out and let cool for an hour. 

Now for the filling, oh boy!

Cook your granulated sugar in a saucepan (I actually suggest one larger than this because you'll be pouring the cream in) and bring your cream to a boil. They should be about the same temperature always because caramel hardens when it hits something cooler. 


Reduce your sugar and you'll notice that the colour is browning. Take a whisk and work out the sugar clumps. 


Quickly, it'll start to turn a golden brown shade. This is about as golden brown as you want it. Once caramel burns, it turns very bitter. Slowly pour in your hot cream, and whisk your caramel sauce. If it does harden because the cream is cooler than the caramel (like mine did), put it over simmering heat to melt down the caramel. I actually had to wrestle with the caramel to get it to turn into a sauce. 

Let your caramel sauce sit in the fridge for 20-30 minutes, remove, then beat in your room temperature butter. Get all the clumps out and you should see this gorgeous filling.  


Get it into your piping bag and squeeze out the excess air. 


 Flip over half of your macaron shells to pipe on.


Pipe in a circle, almost near the edges. 


Cap your piped macarons, giving it a very light push downwards so the filling goes right to the edges. 


And that's it! Comment if you've got questions, comments, or suggestions. Thanks and good luck!

- Jane